Scrolling Laptop Screen (UE5)
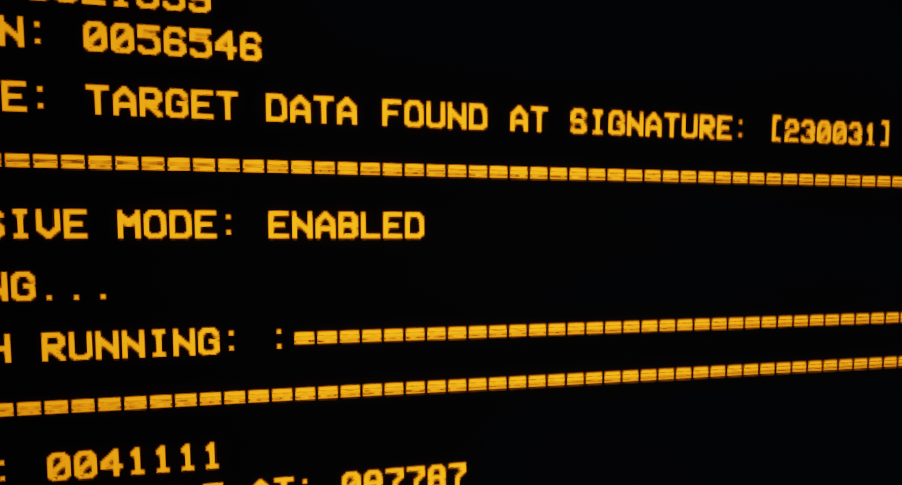
Currently I have a somewhat futuristic scene in progress and took a bit of a side-step to create a scrolling screen effect. I wanted to capture that retro element and keep it looking more like a command line, plus when coupled with an emissive effect, it just looks cool.
Here's where it's at currently, because I'll no doubt refine it further (perhaps using Blueprints):
As I'm just starting to get to grips with a little technical art, it was a bit of a challenge putting it together, although I'm happy with the results. So in this post I've put some form of ramble / breakdown together, various thoughts for future iterations and whatnot.
Before I break things down, here's an overview of the material shader setup:
The Brief:
Before starting this exercise I wanted it to achieve the following:
- Retro (CMD / terminal sort of look)
- It had to glow (because it's backlit)
- It had to scroll as if doing some sort of running task
Displaying Text (And Textures):
This was the fairly easy bit. For the purposes of getting something out of the door fast, it made sense to just rely on texture masks.
So here's a screenshot of the area responsible:
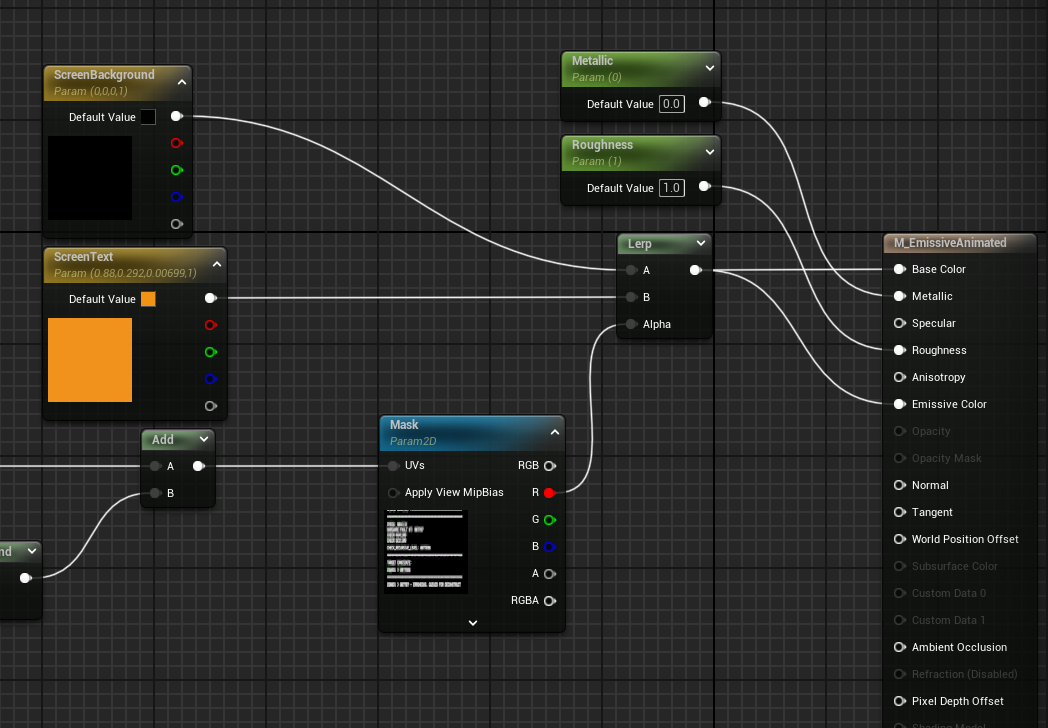
One colour represents the area of the screen that's unlit, so you can imagine a plastic-based LCD screen with no light emitting from it, and the second colour is for the areas that are highlighted (in this example it's the text).
The fun part about this is being able to put a 2D black and white texture, feed it in to the 0-1 value of a Lerp node, and let the shader determine which pixels should from one or the other colour (0 = dark, 1 = light).
I chose the red channel to extract a single value from the mask. Using rgb probably would be fine but, it's one less shader instruction to add to the pile.
Scrolling:
I didn't have a clue to start off with, but by chance I saw an awesome tutorial as part of a larger series by Ben Cloward (go check the series out, it's great), and it really gave me the nudge I was after.
Getting the scrolling texture effect is actually fairly easy. Thankfully there's a time node that we can combine with the texture coordinate node, this then makes the UV values change over time.
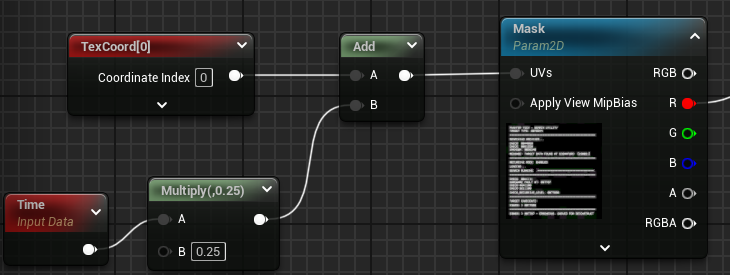
That's great and all, but it just looks a bit boring going at the same speed. I wanted the screen to look like it was pausing to think for a while. I had a few ideas to try, some were okay, some, well, not so okay:
After going back to the drawing board for a while, I realized that there needs to be a count up from 0 to 1 over time, this would slowly increase the value of the UV coordinate. Reaching '1' would be the equivalent to one single UV tile, so the animation would perhaps reset again.
So the solution?
Ask Substance Designer for help:
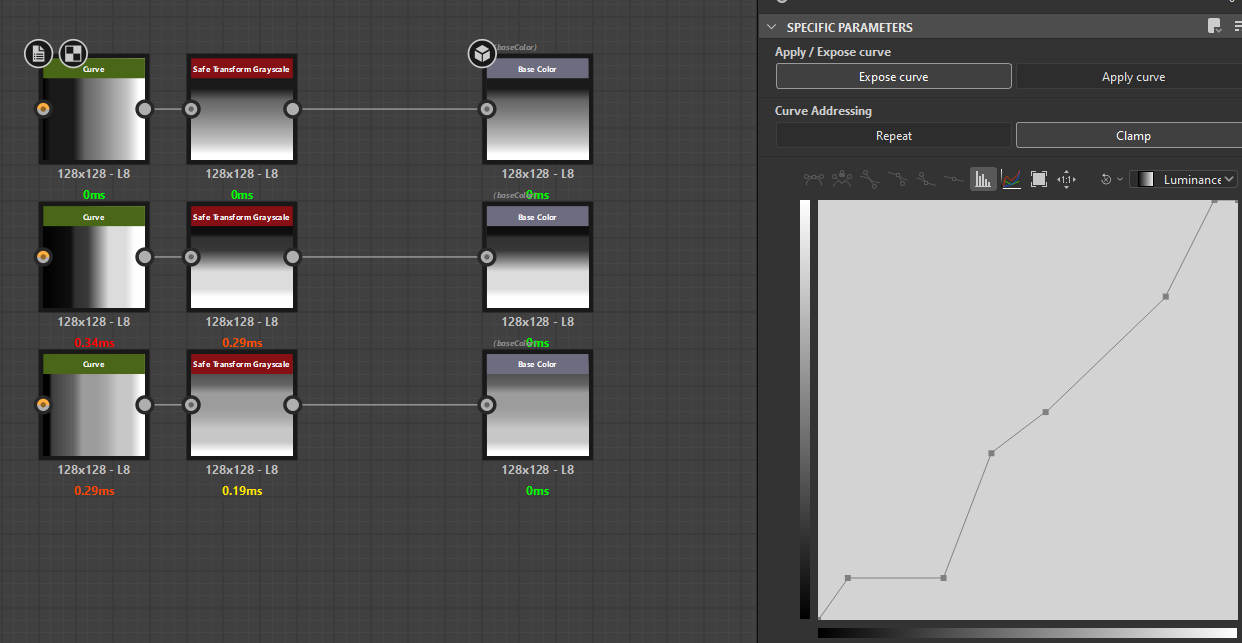
Using a curve I was able to create a journey over time from 0-1. This would give one whole scroll of the texture, and, allow me to customize different types of scrolling animations for different variants.
Straight out of Designer, this texture wouldn't be much different to the original attempt, but this time I decided to scale the texture up so much that we're seeing the value of a single pixel. As the UV texture for the gradient moves across the coordinate space, it produces a value over time as the gradient tracks across (keep watching, it takes a few seconds to kick in):
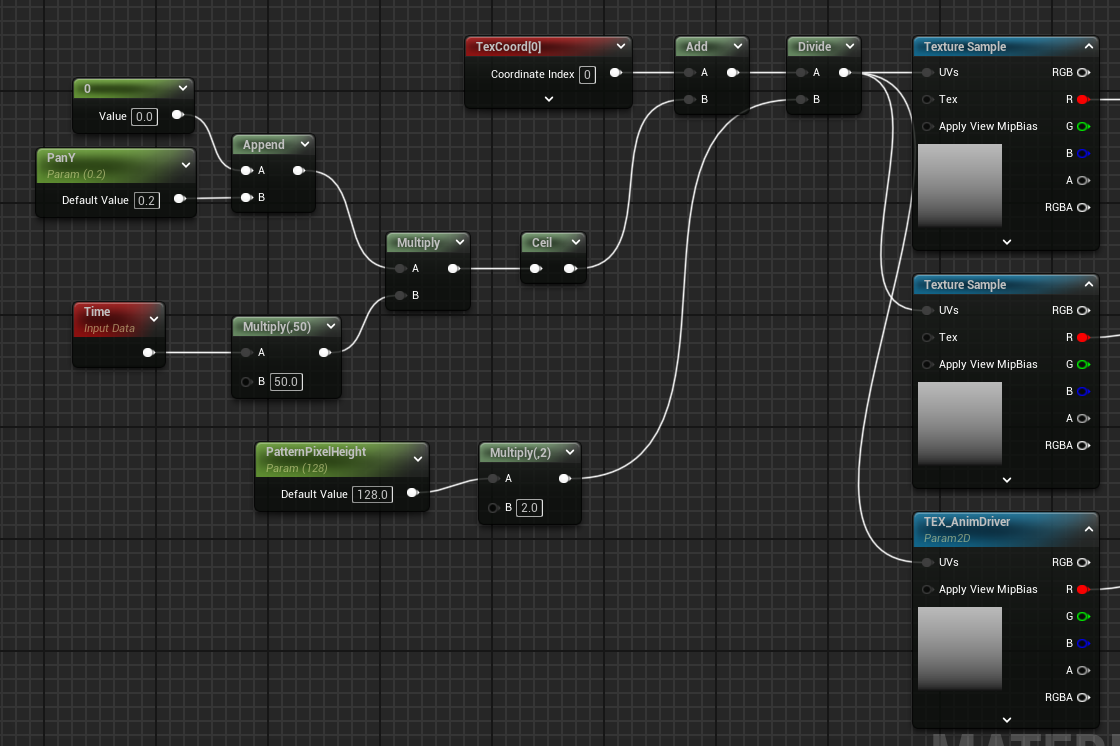
The screenshot above shows where the value of time and scroll speed is combined with the texture's scale to create a linear track over time.
Now the important part about this is that I wanted to have a decimal value that increased between 0 and 1. This would allow the UV coordinates to pan correctly.
A second important thing to mention is that you may notice a 'ceil' node. Without this, the animation looks too smooth and doesn't really fit the command line aesthetic I was going for.
Below is an example of the numbers before and after divisions just to explain further.
Before division:
After division:
Now that there's a set of values being exported from the panning gradient texture, this gives a value over time, and, crucially, at a varying speed which can ultimately be plugged in to the texture coordinate of the mask that was mentioned earlier:

One last thing didn't add up though. I needed multiple instances of the effect in the scene which were varied, otherwise all textures would scroll at exactly the same intervals, which just looks bad.
Separating Instances:
Simply put, converting the actor to a Blueprint allowed for the use of a PerInstanceRandom node. This, plugged in to a lerp colour node, allowed for a few more variations depending on the instance:
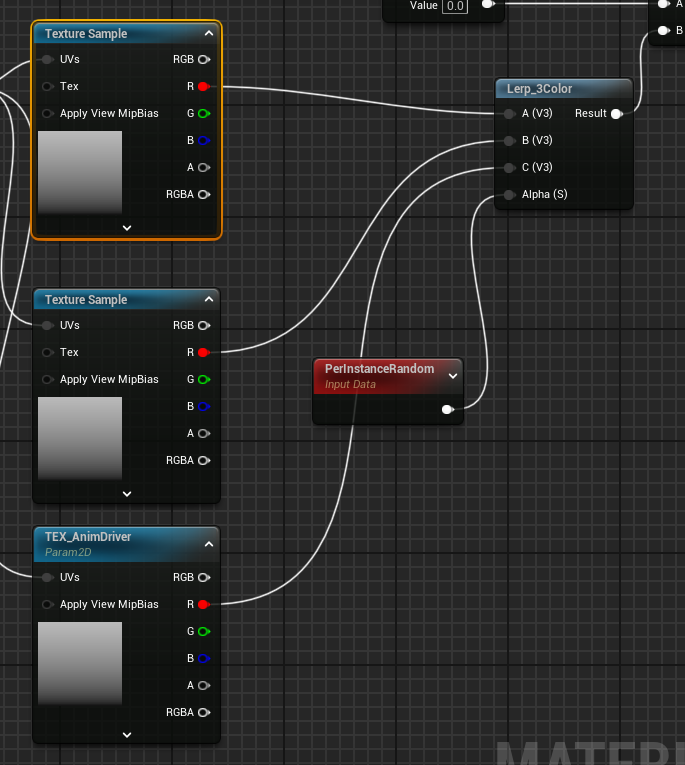
Since I only have two laptops in the scene, the chances of them arriving at the same scrolling texture are fairly slim, but the need will no doubt arrive where I'll have other screens in various shapes and sizes that can't rely on a linear texture this way. It's just not efficient.
So why bother with this method in the first place?
It was a learning experience if I'm honest. And I figured for my initial purposes this method did the job fine, but, after completing it I realized that the randomness could no doubt be produced with a more efficient and robust approach via Blueprints or C++. Especially now that the static meshes have been converted to Blueprint actors, it's essentially half way there already.
For the next iteration I'll be looking in to this as a solution instead. It also offers the benefit of creating way more random screen behaviours per UV scroll.
Conclusion:
Well if you made it this far, thanks for reading. I totally appreciate that it's early days and some of the terminology might not be quite right, but that aside, the learning journey worked out for the best, so I look forward to the next bit.
Cheers!